How to build your own seat plan?
UPDATED February 2024
In all versions there is osConcert Design Mode
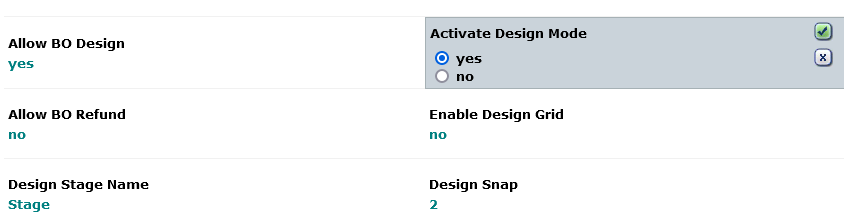
To start creating seat plans in Design Mode we must first access the Administration as Top Administrator. Then we should activate the Design Mode in Admin>Concert Details>Box Office
PLEASE ALSO DISABLE 'Seat Plan Cache'
Admin>Concert Details>Seat Plan>Seat Plan Cache
and Clear Seat Plan Cache Admin>Clear Seat Plan Cache
or we will have problems with the pages we are trying to build.
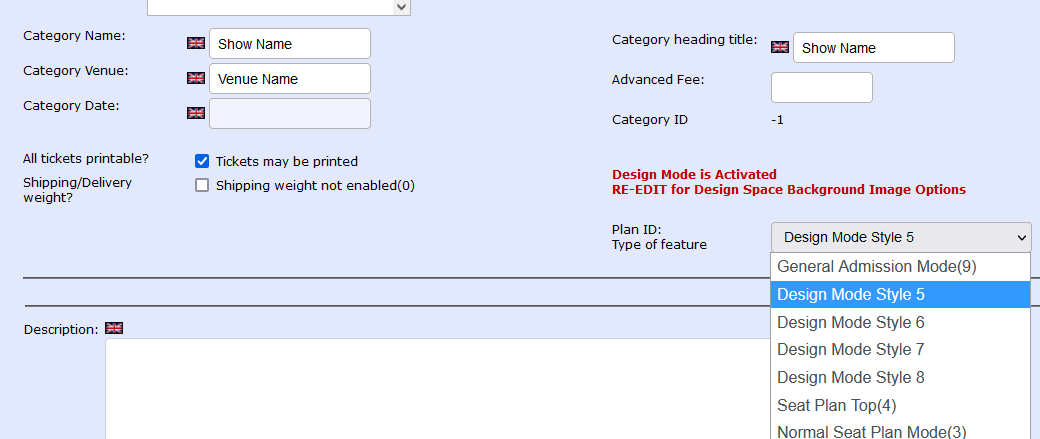
The first action you will want to do is create a New Show Category for your seat plan.
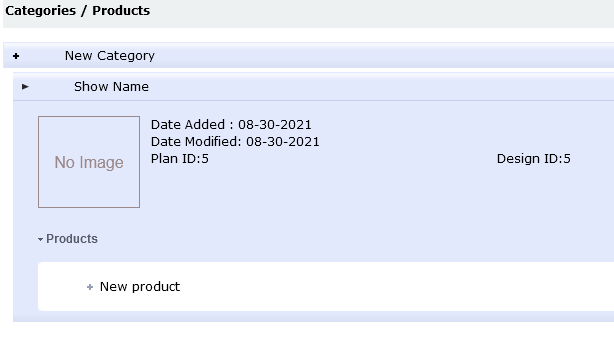
The Top Administrator must create the products, the text and the props so that a Front End Box Office account can eventually move the objects in the Design Space...effectively designing the seat plan.
IMPORTANT NOTE: All products created for the Design Space will be relative to each other. This means if you delete any this will most probable affect the position of some or all of the objects. Therefore take this into consideration when designing the seat plan.
Products that you don't want to be seen should be hidden (Admin>Alternative Categories Edit>HIDE)
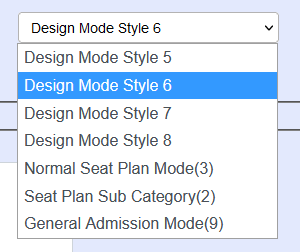
Goto Admin>Products and create the Show Category just like if it were a General Admission Event. For the Type of feature select a Design Style e.g Design Mode Style 5...this represents a standard stylesheet that will dictate the shape and styles of our objects on the Front End. There will be 4 styles to choose from and they can be easily adjusted by accessing the file with a html text editor.
EACH OF MY 4 DEFAULT DEMONTRATIONS USES A DIFFERENT STYLESHEET
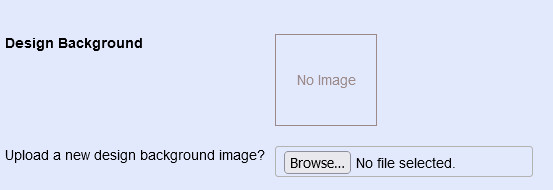
Now before we create Seat Products we can upload a backgound image for the design space. This could be a guide image like your own complete seat plan as an jpg image. This would make it easier for the designer at the front end to easily arrange the seats in the correct place.
Furthermore .....we should adjust the Design Space relative to the full width default=1100px
EXAMPLE
So I guess if your image width is 960w / 576h pixels the ratio required will need an image height of 660 pixels
You can enter the height of your image in the new field :
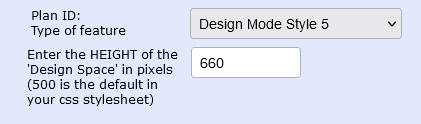
Now your image will keep a good ratio (1100w / 660h) when collapsing for devices in responsive mode.
Let's start adding Seat Products
Create your first product. Let's make a Seat product and call it Seat 1
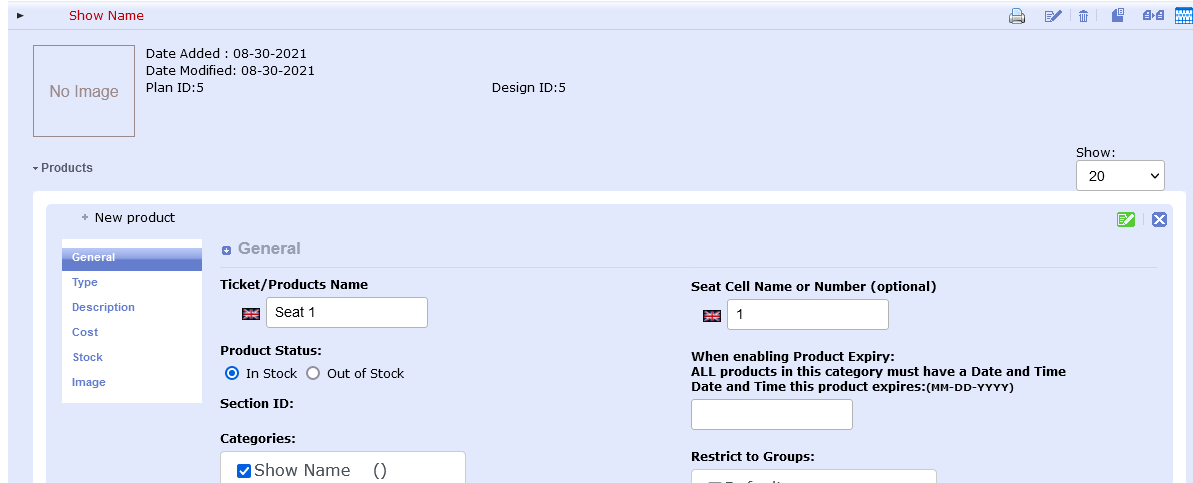
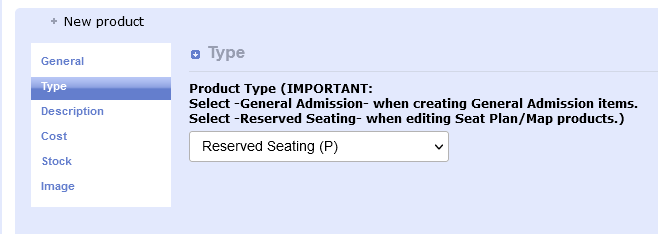
In the TYPE TAB.....let's make sure we select Product Type= Reserved Seating (P). That means the product is a seat product which has a price, color band, stock=1 ....we can adjust these things later, ...for now IGNORE COST AND STOCK let's just create lot's of seats with their names and numbers.
(it's possible to also upload a Ticket Image for your checkout process in the IMAGE tab)
Make sure you click the SAVE button and we have our first product.
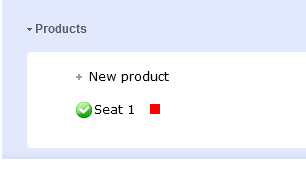
If we want more products the easiest way is to use the COPY function and copy as many as we need. For this tutorial we will copy our first product and then edit and rename it as Seat 2. We will then explore the results at the Front End.
There are ways to create numerous products if you use database imports....but for novices, the COPY function takes only a few seconds per seat......you can have a hundred seats in no time if you set your mind to it. I know some feel this is hard work.....but every seat needs a name and number and only YOU know what you want. I don't have an AI version yet.
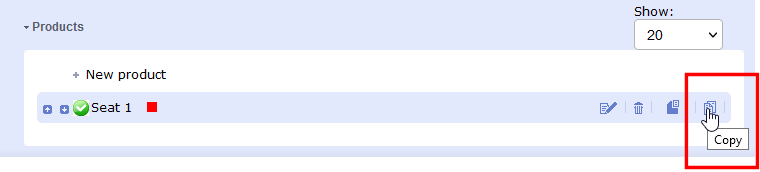
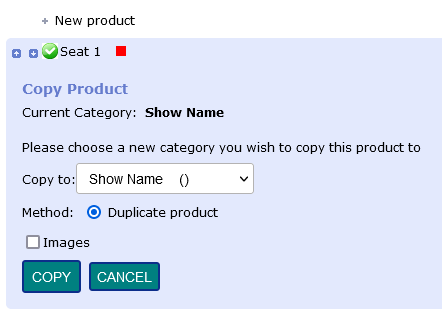
Choose duplicate product and click COPY. (also check images if you plan to have a Ticket Image)

Now we have 2 products ready for this tutorial. Let's go to the Front End and take a look at what we have got.
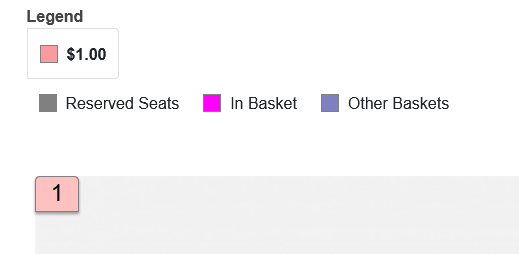
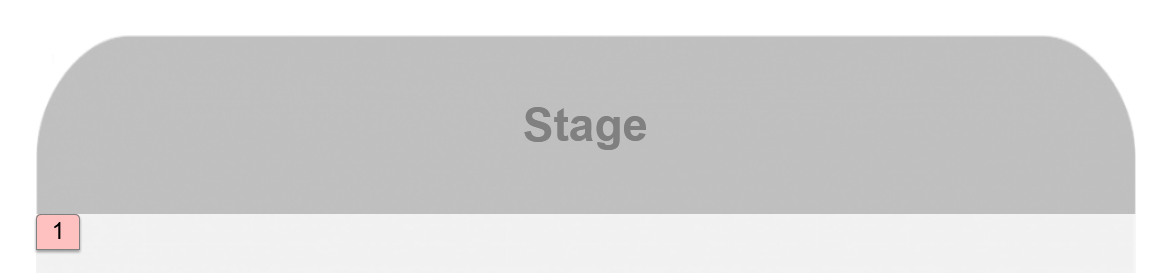
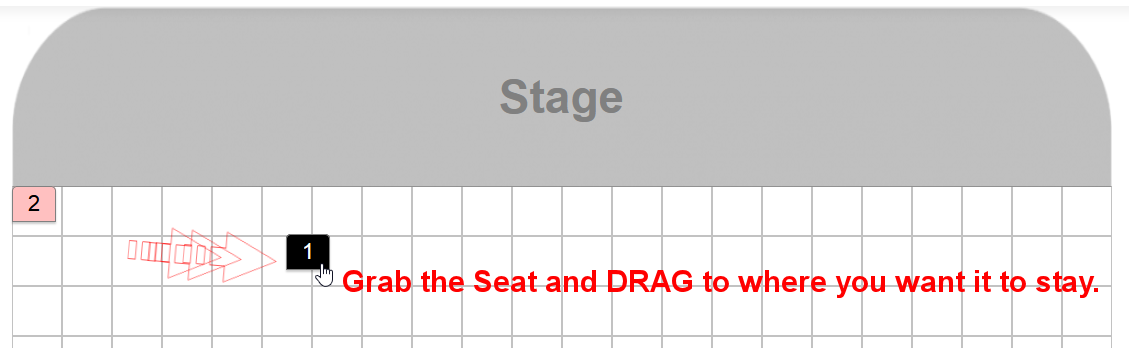
We see the default Design Background and the products loaded at the Top Left of the design space.
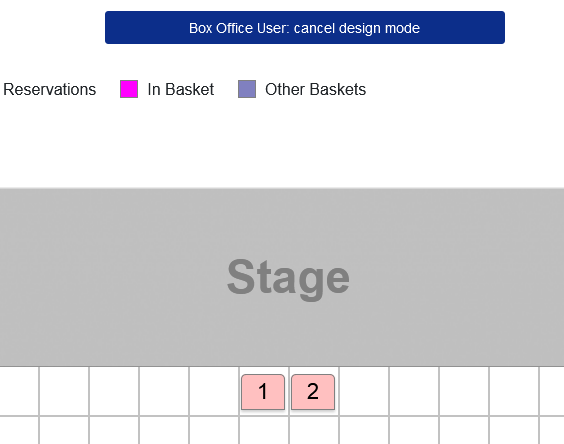
When we login as Box Office we can drag the seats from the stack and place them wherever we like in the Design Space.
But first let's go back to the Administration because for this tutorial I want ot have a Stage Label and because I didn't upload a stage image it remains default = none.
Open the Show Category for edit and scroll down and we will see options to upload images for the category. We want to upload an image for the Stage ...so will upload the image below:

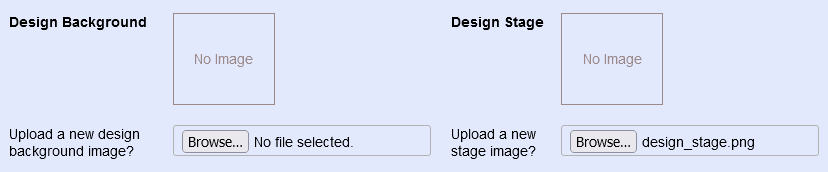
I have a default stage image from the outset but for now you are able to upload your own image or the default image provided in the osconcert/images folder.
 Upload and Click the SAVE button as usual.
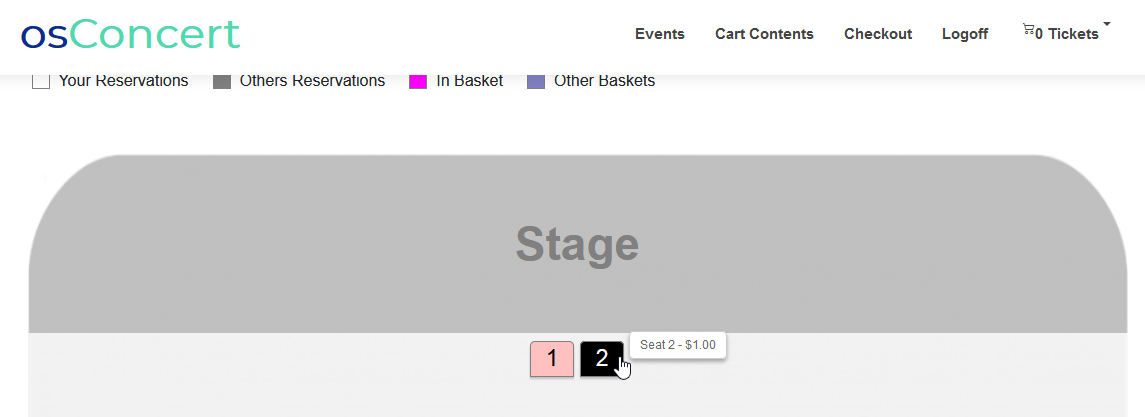
Now let's go back to the Front End and view the stage image.
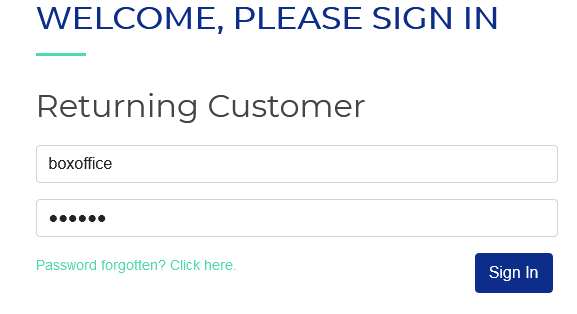
Now we should login with our Box Office account because only Box Office Staff have the right to move objects in the Design Space
Goto the osConcert Login:
Now go back to the Show category on the Front End and click the blue "click to Redesign Seating" button
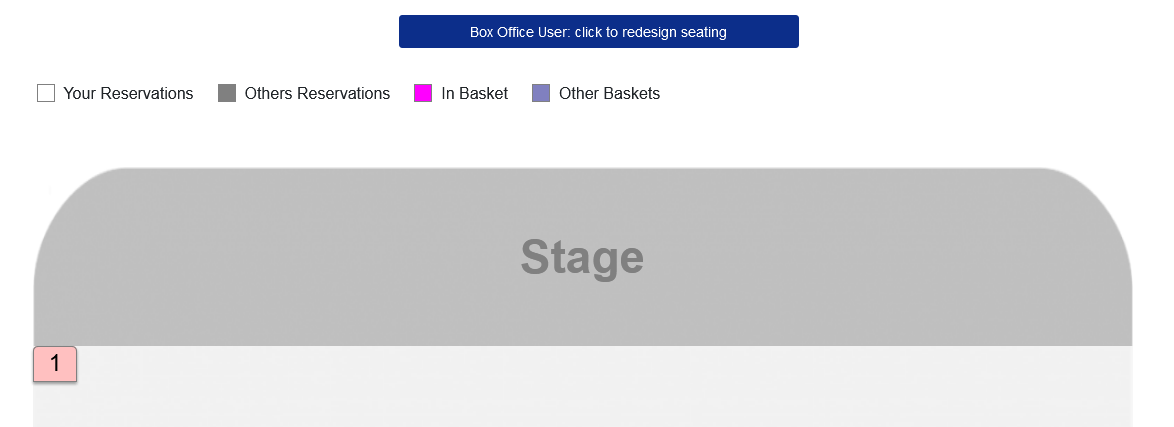
Now you should see a Design GRID (default is 50 pixels but it could be 10px or 100px )
Grab the products with your Left Click>Mouse and DRAG them around the Design Space ...where they stop will be recorded in the database until you decide to mode them again. Only Box Office has this access.
Now you can Cancel the Design Mode and Logout from your Box Office Account and the products will be ready for the Booking Process. make sure as Administrator the Concert Details are set as usual for your event and the Prices are set per Color Band of course.
To this point ...that is the very basics of creating products and designing the seat plan arrangement of the chairs. Next we will create Text e.g Row Letters and Props e.g Sound Desk
Creating Text and Props
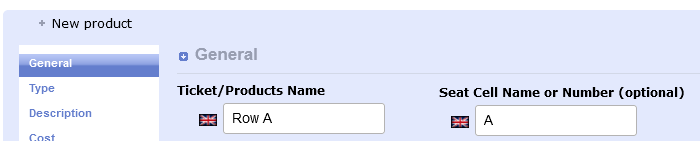
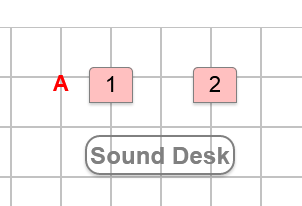
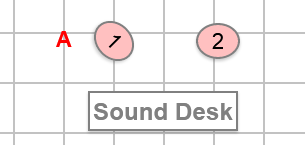
When we have Rows of Reserved Seating ...it would be a helpful to show the Row name e.g Row A for seats in row A :)
Simply create a New Product.... Name it 'Row A' and number it as 'A'...then we should choose the Row Name/Number Text in the Type Tab and SAVE
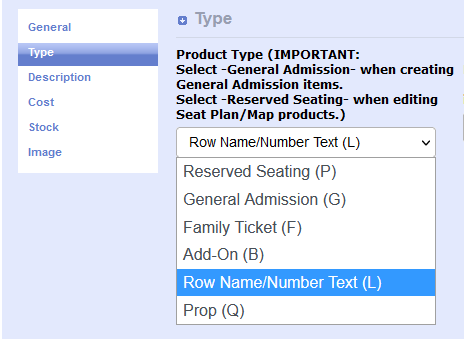
That's it! Go to the Front End Design Mode and you should be able to 'drag' it into place.

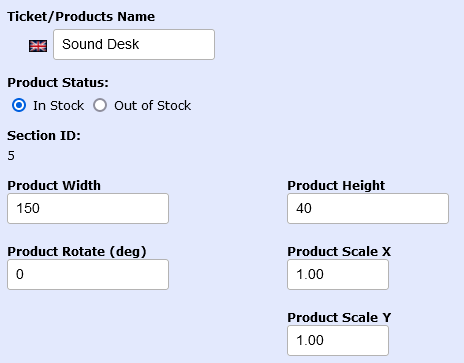
For something like a Sound Desk prop ...follow the same procedure but choose Prop from the TYpe Tab drop down menu.
Now we will need to give the object a width in pixels and maybe enlarge it a little
For this example I write Sound Desk ....width=150 pixels height 40 pixels and Scale +1 and SAVE the product!
Rotating objects
What if we want to rotate an object e,g 45 degrees
Just edit the product and add 45 to the Rotate Input. (or PASTE -45 into the input field for the opposite angle)

Styles and stylesheets
NOTE: Basic styling is saved in specific css stylesheets in templates/newzone/assets/css/
seatplan5.css
seatplan6.css
seatplan7.css
seatplan8.css
When you edit your category you can choose another of the 4 stylesheets
If you are familar with css styles you can edit the master stylesheets and create something really special.
Seatplan 6 has a basic circle as seats.
That's the very basics of the Design Mode....obviously for more complex creations it will become an art.
Perhaps some users will surprise me :)